Life is a highway
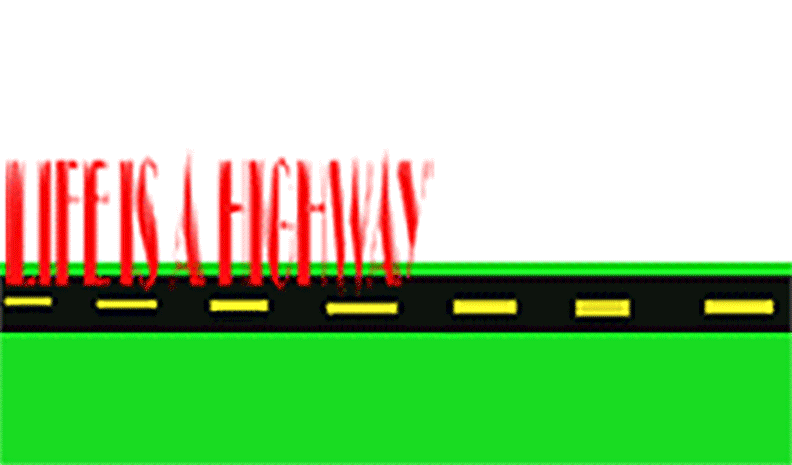
Instructions:
1) Use the rectangular marquee tool to make half the background green and half of it white
2) Make a road also using the rectangular marquee tool; make it black
3) Add yellow lines using the rectangular marquee tool again; make it yellow
4) Create a text box and type in "Life is a Highway" in red Broadway font; make the text larger by dragging the corner of the text box up to the writing then free transform it to the size you want
5) Create a wind effect by going the edit dropdown, transform, and rotate 90 degrees CW
6) Go to filter dropdown pick stylize then wind
7) Edit dropdown then transform, rotate 90 degrees CCW and place it on your road
8) create a new layer
9) Make a car brush: first pick a car image you like, save it, and open it up in photoshop
10) use the magic eraser to erase everything except for the frame of the car
11) go to edit dropdown then define brush preset
12) Go back to your road picture and pick the car brush; make sure you pick a good size: 85 worked for me
13) Pick any color you want for your car (I picked royal blue); put your car at the right side of the picture, on the road
14) Create a new layer and make your car go further up the road
15) Keep doing this until the car is lined up all along the road (each car on a different layer)
16) go to window dropdown and click the timeline, then press create video timeline on the bottom of the screen
17) Click the 3 little squares in the bottom left hand corner
18) Unclick the eye button next to each layer so you only see one car at a time whil also pressing the new slide button between every different car
19) Make every slide 0.1 seconds long
20) it looks a bit choppy, so click the tween button (it looks like a sort of shooting star), put tween slides in between the slides you think are too choppy
21) make sure you have it looped on forever
22) You have finished your gif, now watch it to the tune of "Life is a Highway" by Rascal Flatts
Holiday tree
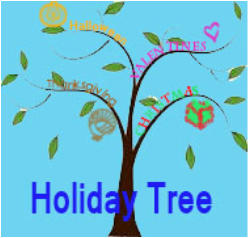
Instructions:
1) Find a picture of a tree and open it up in photoshop
2) Add a layer below the tree layer and make it light blue
3) create a text box and write "holiday tree" in blue Broadway font; drag the corner of the text box next to the word
4) ctrl+t and make the text bigger, and drag it to the bottom of the page
5) create a path along a tree line and write "Christmas" on it in green and red font
6) copy step 5 on different branches for "valentines" in pink font, "Thanksgiving" in brown font, and "Halloween" in orange font
7) Make a stamp of a present, pumpkin, turkey, and heart; how do you make a stamp? look at the next step
8) find a picture of a heart, turkey, pumpkin, and present (separately)
9) open them up in photoshop and use the magic erase tool to erase everything except for your object
10) go to the edit dropdown and click define brush preset
11) now use the stamp: turkey near the word "Thanksgiving", the present near "Christmas", the heart near "Valentines", and the pumpkin near "Halloween"; all in the same colors of the words
12) Now enjoy your new greeting card for the next Halloween, Christmas, Thanksgiving, and Valentines Day :)
The planets that matter
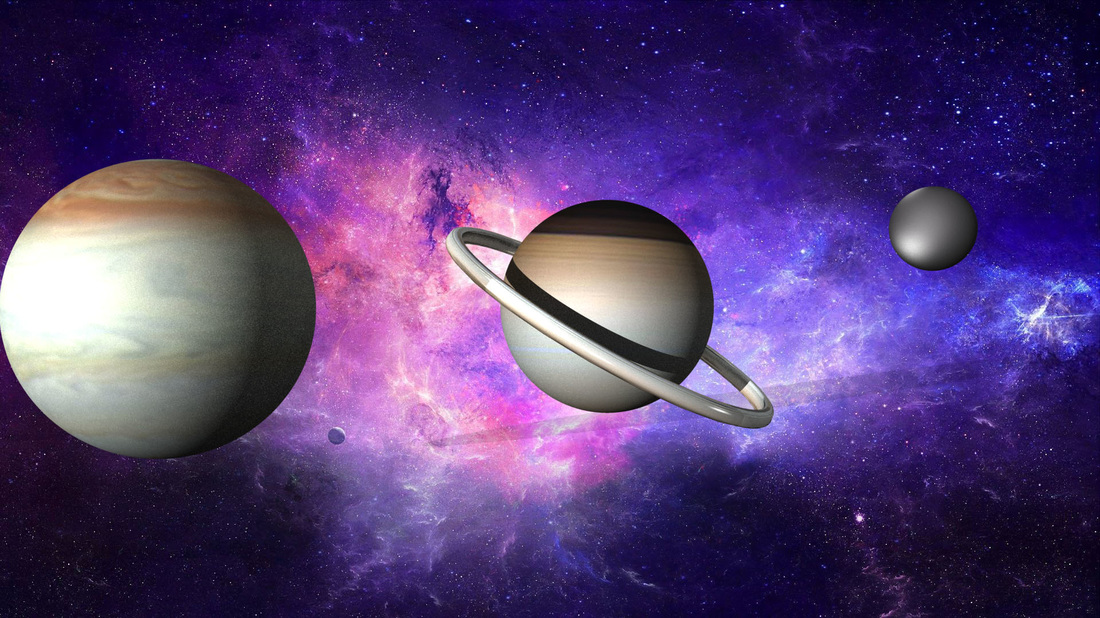
Instructions:
1) Find a picture of the galaxy
2) go to the 3D tab and press the create from mesh pre-set with the sphere
3) make this sphere very large
4) find a picture of the colors of Jupiter and open it in a separate project
5) use the rectangular marque tool to make sure only the colors you want takes up the entire picture and save it
6) go to the sphere materials 3D layer and go to the properties box and go to diffuse- click the button next to it and press replace texture and pick the color
7) now make another sphere by clicking on the fly out button on the 3D layer and press add object
8) Do the same thing you did with Jupiter on the colors but use Saturn's colors instead
9) Size the new sphere so that it's a little over half the size of Jupiter
10) go to the 3D layer fly out button and press add object but this time pick a ring
11) size the ring so that it is thin and encompasses the sphere at an angle
12) go to the 3D layer fly out button and add another sphere
13) make this sphere significantly smaller than the other two
14) create a new file and fill it with gray
15) add some dots of white using the paintbrush tool
16) Go to the sphere material layer and replace the material with the gray color
17) change the infinite light so that it is coming from the right like the sun would
Now you have Jupiter, Saturn and Pluto- the planets that matter
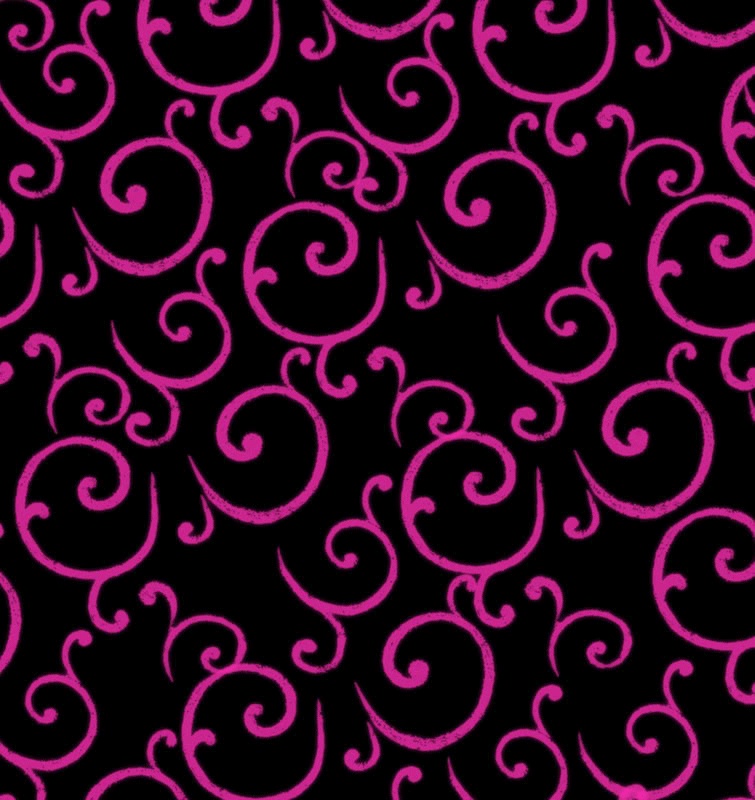
Instructions:
1) Get a swirly pink background and open it up in photoshop
2) Now open up a picture of yourself preferably standing up
3) cut out the background so that you're the only visible thing in the layer
4) use the rectangular marquee tool to select yourself and go to edit-copy
5) now go back to your swirls pic and go to edit-paste
6) press control+j to copy the layer a couple of times
7) using the move tool, move one version of yourself so that the head is cut in half by one of the swirls
8) use the eraser tool to erase everything except for the part of you that is above the swirl
9) now take another copy of you and place it a little higher
10) once again use the eraser tool to erase everything below the swirl
11) continue this process until you get yourself fully out of the swirl
12) now move to a new location and keep copying the steps
13) when you reach the last copy press ctrl+j to make more copies
14) after you're done with that you can go to a copy you have not used and go to edit-transform-rotate 90 degrees
15) press ctrl+j to copy those layers
16) then proceed to use directions 7-12
17) you can also choose to rotate it 180 degrees to make an upside down pop up you
18) now go to window-timeline and press create timeline
19) press the 3 little squares in the corner and make sure none of the layers except for the pink swirl background is visible
20) press the new slide button and make only one of your small heads visible
21) make the head disappear by making the next slide where the background is the only thing visible
22) now make a different head pop up and go back down in the same manner
23) now, using new slides, make one of you come up all the way and on their way down make another one's head pop up and down
24) now make multiple ones, on different sides of the picture, come up at different rates but still at the same time
25) Keep doing this until all of your people come up and down at least once
26) you can add tween slides as you see fit and time it so that it doesn't seem so choppy
