my portfolio
I decided on a circus themed portfolio. For my first piece, I decided to do like an introduction piece to the circus and I made it a gif.
Instructions
1) Find a picture of a circus ring, a ring leader, an elephant, and trapeze artists
2) place the circus ring as the background
3) make a text box and write "Welcome to the Circus" in it; make it bigger by dragging the edge of the text box to the words
4) click ctrl+t and make it bigger and put it at the top of your circus ring
5) make a copy of that layer twice by clicking ctrl+j
6) create a new layer and put your ring leader right under your wording; it would be great if he was pointing to the words or something
7) now make a copy of that layer twice by also clicking ctrl+j
8) Now take your elephant and put it in a new layer
9) copy the elephant layer and press edit dropdown transform- flip horizontal
10) Now get your trapeze artists in the corner so like they are swinging from the corner
11) Make 3 copies of that layer once again using ctrl+j
12) use ctrl+t to transform each trapeze artist to look like they are swinging back and forth
13) go to window- timeline
14) press create timeline and press the 3 little boxes in the bottom left hand corner
15) now hold on, we forgot about the glow so go to the word layers and go to layer- layer style- outer glow
16) make the glow spread further with each different slide of the word
17) Do the same with the ring master slides
18) Okay back to the timeline, Make it so that the trapeze artists are at the lowest they can be, the words have the least or no outer glow (same with the ring master), and the elephant can be either direction
19) create a new slide and make the elephant turn the other direction, the ring master and words have a glow, and the trapeze artists get higher than the last slide
20) create a new slide and make the elephant turn around again, the words and ring master glow the brightest and the trapeze artists go the highest
21) make the time for each slide 0.1 sec. long and loop it for forever
22) use the tween tool (looks like 3 little circles/ or a shooting star) and insert 5 tween slides in between the slides you have
Welcome to the Circus: There is no going back
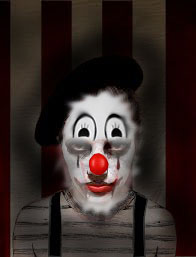
This is my first clown; its a little creepy but I like it. Had some help from Mady.
Instructions:
1) Get a picture of a creepy clown and a picture of a happy clown mask
2) use the brush tool and set the opacity at 20%; and make the area around your clown darker make sure the immediate area around it is the darkest
3) Put the clown mask on a layer above the clown by opening it up in a new tab edit- cop; then go back to your clown picture add a layer go to edit- paste
4) use the pen tool to cut out the nose then right click and hit "make selection"
5) copy that to a new layer by clicking ctrl+j
6) now go back to the mask layer and use the eraser tool on 20% opacity
7) make the bottom half of the mask see through so that you can see most of the scary clown
8) go back to the nose layer and place the solid nose on top of the scary clown's nose
9) finally use the smudge tool to make the edges of the happy clown mask spread outwards
You have finished your clown; ain't it scary?
Wanted to do something with tigers, so this happened.
Instructions:
1) Find a picture of the inside of a tent. Find pictures of tigers in different positions. Find pictures of fire rings or just a fire ball.
2) Open them up in photo shop, having the tent being the main picture you're working on.
3) Behind the tent add a black layer.
4) Erase four small holes (including the enterance) so that black is showing.
5) Go to Filter-Liquify and pick the top most tool that is shaped like a finger.
6) create an effect of the tent melting or distorted enough to have a difference, especially near the holes.
7) With the tiger picture, use the magic eraser tool to get rid of everything except the tiger.
8) Use the marquee tool to select the tiger.
9) Go to edit-copy.
10) Go back to your main picture of the tent and go to edit-paste.
11) Click ctrl+t to transform the tiger to a place you want.
12) repeat steps 7-11 for all you tiger and fire pictures.
13) For the pictures of fire- press ctrl+j and use the smudge tool to slightly change the shape of the flame
14) Pick a central tiger (one that doesn't move) and add an outer glow around it.
15) Go to window-timeline and press create timeline.
16) Then press the three little boxes in the bottom left-hand corner.
17) Pick a form of the fire you want then press the new slide button and change the layer that is seen (the eye button on the side of every layer)
18) continue this until you run out of the fire slides you've created.
19) Using the tween button, looks like a shooting star in the bottom left-hand corner, put 4 slides between each of the ones you created.
20) Make sure all the slides are set to 0.1 seconds, and check that it is on a loop forever.
21) Go to file-save for web, and you're done.
Enjoy your melting tent of Tigers.
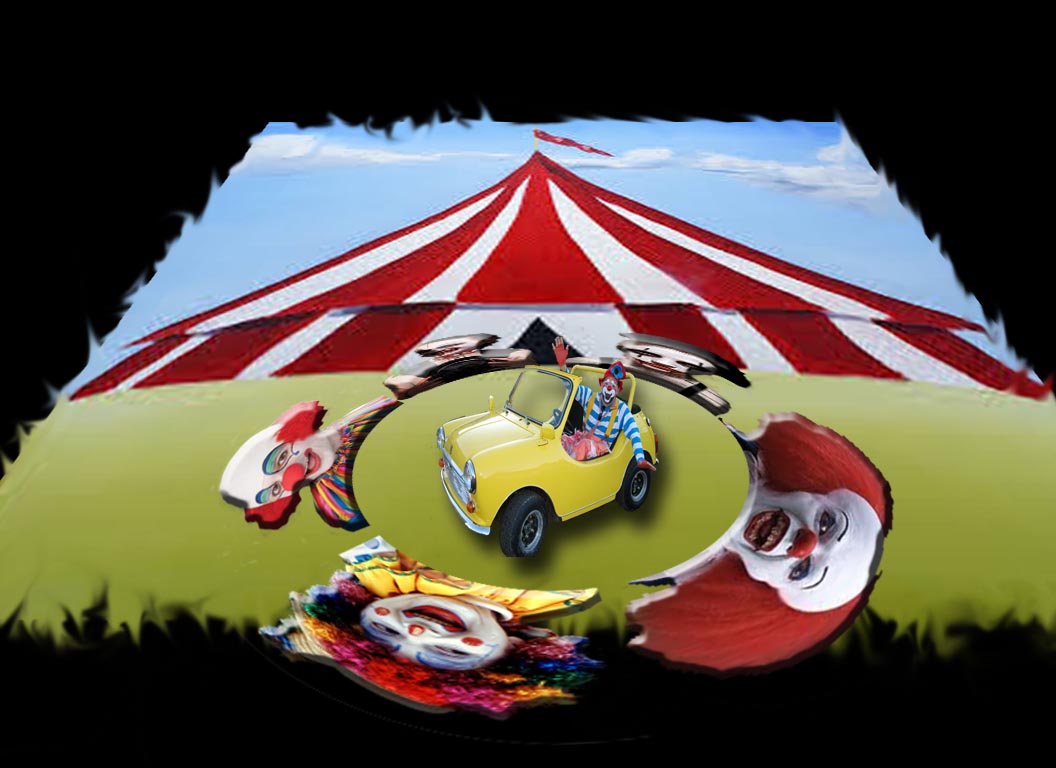
Instructions
1) Find a picture of a tent, five clowns, and a clown car
2) Open a new file and fill it with the color black
3) Open the picture of the tent and copy it onto the black background on a separate layer
4) go to edit-transform-distort and pull the bottom wider while keeping the top more narrow
5) Use the smudge tool to smudge the edges of the picture
6) line up all five clowns and use polar coordinates to forma circle with an empty hole in the middle
7) Go to layer- layer style- bevel and emboss
8) Take the picture of the clown car and copy it on a new layer on the tent
9) Make it so that it fits into the circle created by the other clowns
10) Add a drop shadow to it by going to layer- layer style- drop shadow
Clowns are the best, jk they are horrifying
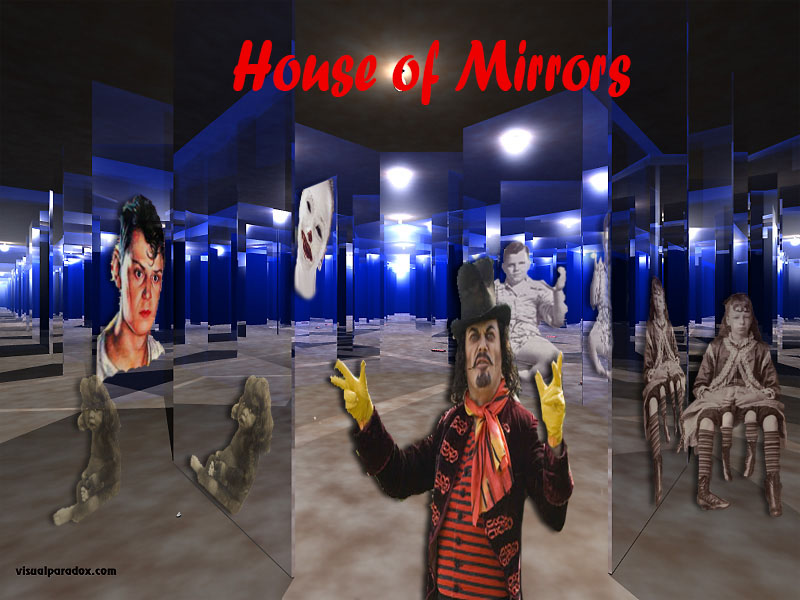
Instructions:
1) Find pictures of a ring leader, people involved in circus freak shows and a room filled with mirrors.
2) Open the house of mirrors and open up one of your freak show pictures.
3) use the erase background tool so that you're only left with the person
4) go to edit- copy then move back to the house of mirrors and go to edit- paste
5) Arrange the picture so that the person is in a mirror
6) press ctrl+j to copy it
7) go to edit-transform-distort to move the copy of the person to the mirror opposite to the one they are in
8) use the eraser tool on a low opacity to make the image seem to be faded
9) do the same with the other freak show people and make sure to put them in separate and spaced apart mirrors
10) vary the fading so that the further back it goes the clearer it seems
11) take the ring leader and put him front and center in the room
12) bonus points if he looks weird too
13) Give all the layers drop shadows by going to layer-layer style-drop shadow
14) Add a text box at the top and put "House of Mirrors"
15) boom done
House of Mirrors? More like House of Horrors, am I right?
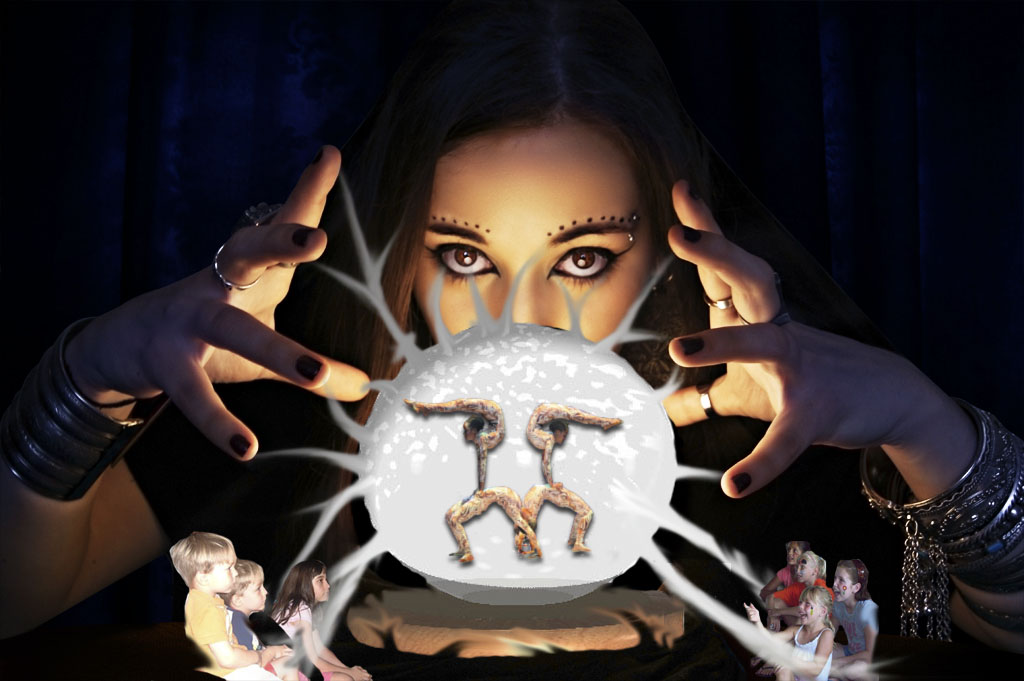
Instructions:
1) get a picture of a fortune teller and cut out the crystal ball
2) open up a new document and go to the 3D tab and press create from mesh preset and open a sphere
3) go to the fly out menu and pick add another object, pick the soda bottle
4) line up the bottle so that it lines up right under the sphere and use the box on the arrow to squish it so it looks more like a stand
5) Find a picture of wood and save it
6) go back to your fortune teller piece and go to the soda bottle diffuse and press replace texture and pick the wood
7) now go to the sphere material and press remove texture and pick a really light grey
8) move the infinite light so that it shines directly on the sphere from the front
9) now press edit-copy
10) go to the fortune teller and press edit-paste and move it so that it looks like the fortune teller is holding her hands around it
11) Use the smudge tool to spread the color to her hands and face, make sure it looks like it connects to her
12) Now get a picture of contortionists and open it in photoshop and cut out the background
13) go to edit-copy and then go back to the fortune teller and press edit-paste
14) press ctrl+t to make it fit inside the crystal ball
15) go to layer-layer style- bevel and emboss
16) go to the internet and find pictures of children watching a show
17) open it up in photoshop and cut out everything except for the children you want in the fortune teller piece
18) place the children on either side of the crystal ball and make it so that the mist from the ball surrounds the kids
19) also make it look like the darkness surrounds or even mixes with the kids laps or the mist
20) make the stand of wood seem to mix with the black as well
This show will captivate you

Instructions:
1) Find a picture of a clown and 4 aerial silk performers and save them
2) Open a 10 by 10 inch picture and make the background black
3) Open the clown photo and cut out the background
4) copy it and then paste it on the first piece at the top middle
5) Make sure it covers the width of the picture
6) Open up the pictures of your aerial silk performers
7) Make it so that the background disappears and the performer is all that is left
8) edit-copy then edit-past each one on a different layer in the black background piece
9) Now choose one to work with and make it so that it looks like it is hanging from the clown
10) Go to filter- filter gallery and choose one that you like
11) do the same with the others but with different filters you like
12) They can overlap some too
13) Make a new layer and use the gradient tool with half of it being a pinkish color and the other half transparent
14) Spread the gradient vertically along the right side of your piece
15) Use the smudge tool to fade some of the silk to the gradient part
What a Beautiful Performance
Instructions:
1) Find a picture of an open eye without a glare and open it up in photoshop
2) Erase the white surrounding the eye
3) now change the opacity of the eraser to 15% and make the actual eye (not the skin surrounding it) more see through
4) Find a picture of a closed eye that has similar skin color and line it up on the layer above the regular eye
5) now press the eye button on the side so it is not visible
6) Get a picture of any circus act you want and put it on the layer behind the eye
7) make sure that the act can be seen around the eye or that the eye is opaque enough to be seen through
8) Do this with as many acts as you want but make sure they are all different
9) Open up the timeline and press create timeline
10) For the first slide just have the closed eyelid visible
11) For the second slide just show the eye and one of the acts
12) switch BETWEEN THE CLOSED EYE AND THE ACTS UNTIL YOU USE EACH ACT EXACTLY ONCE, creating new slides along the way
13) Put the slides to .1 seconds and the eye slides put it as .2 seconds
14) use three tween slides between each existing slide
15) DO NOT PUT ONE BEHIND YOUR LAST CLOSED EYE; END YOUR SLIDES ON A CLOSED EYE
16) Some idea credits go to Ciara cuz she thought of the closed eye part
What will you see at the Circus?
Instructions:
By the way it was supposed to be way better and not have that awkward pause at the end but adjusting the image made it worse
1) get a picture of a lion and pictures of random articles of a ringmaster's clothing especially the whip and the hat
2) Open them up in photoshop and make the clothing spread around to make it look like he was eaten add blood if you want
3) Add a new layer and put a word path on it
4) Type "The Circus" or something along those lines
5) Go to type-3D and make the words 3D
6) make the words tiny and in the center of the page and press ctrl+j to copy it
7) make one of the copies invisible and click on the other one to make it only slightly bigger
8) then press ctrl+j again and copy those steps until the words are literally coming off the screen
9) go to window-timeline and press create timeline
10) make the first slide only the tiger visible
11) for each following slide make the next size bigger font visible until it looks like it has come off the page
12) Loop it for forever and set the slides for 0.1 seconds
13) add tween slides if you want
King of the Jungle- King of the Circus
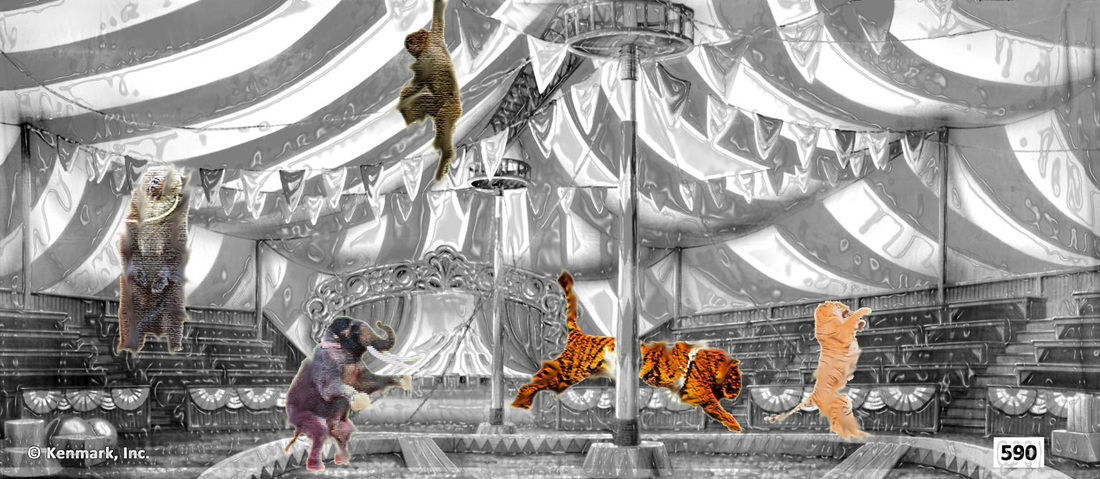
Instructions:
1) Find a picture of a circus tent
2) go to filter-filter gallery and pick plastic wrap
3) find a picture of an elephant and open it up in photoshop
4) erase everything except for the elephant itself
5) go to filter-filter gallery and pick texturizer
6) now use the rectangular marquee tool to choose the elephant and go to edit-copy
7) go back to the tent and do edit-paste and place it anywhere you want
8) go to layer-layer style-inner glow
9) copy steps 3-8 with different circus animals and as many as you want, I just decided to do one of each
10) Once that is over, use the smudge tool to give it an unreal kinda feel (hehe that rhymed)
11) Try and make at least one be behind an object by erasing parts of the animal to make it look like it is behind the object
How did you like my Circus? Or is it even real?
